METAVOIDAL
An Indie Dev's Guide to Rendering Inside Of The Lines
Hello! And welcome back to our third, and final Yellow Lab Devlog!
In this installment we’ll have a rather deep insight into the inner-workings of Ross’s brain on the topic of rendering outlines in a game using Unity. It’s a bit of light reading, if you’re interested in this kind of thing

An Indie Dev’s Guide to Rendering Inside of the Lines!
Metavoidal is a bit of a Ship of Theseus; at this point we’ve replaced so much of the structure, can we even call it the same game or is it a brand new creation?
We’re continuously building towards a release, while still trying to find the best game we can along the way. Its had multiple names since we started development, and the gameplay & theme have shifted greatly over time.
As a result of these changes, the systems that once made a lot of sense turn into frustrating limitations that we need to exorcise to make progress.
One such exorcism was deciding to move our rendering pipeline from the old built-in rendering pipeline to the universal rendering pipeline (URP). (Which Fillipo spoke a bit about in our previous Devlog!)
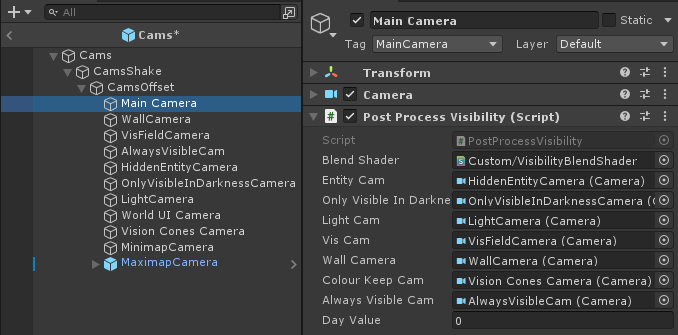
I count 11 cameras there. Apparently we like pain.
This decision was mostly driven by our monolithic post-processing shader that was used to composite 8+ cameras that were rendering different parts of the scene together (eg. player, enemies, walls, floor, props… etc).
This system worked for the game at the time, but compositing these separate camera outputs was super inefficient and caused MANY visual bugs. These bugs were solvable… maybe…(?) but everything needed to be handmade, and required us jumping into a complicated, large and very fragile shader. It became apparent our current approach was a GG.
Try compositing these textures so the sorting order and culling works correctly in all cases.
The URP provided us with stock 2D lighting features, as well as a more customizable render pipeline. We took the risk to switch over, got rid of the monolithic compositing shader, and now the game runs and looks a lot better! The art team is having fun with the new lighting and emission systems, and it all works with the stock post processing stack.
So why is the game not finished yet you may ask?
Well…
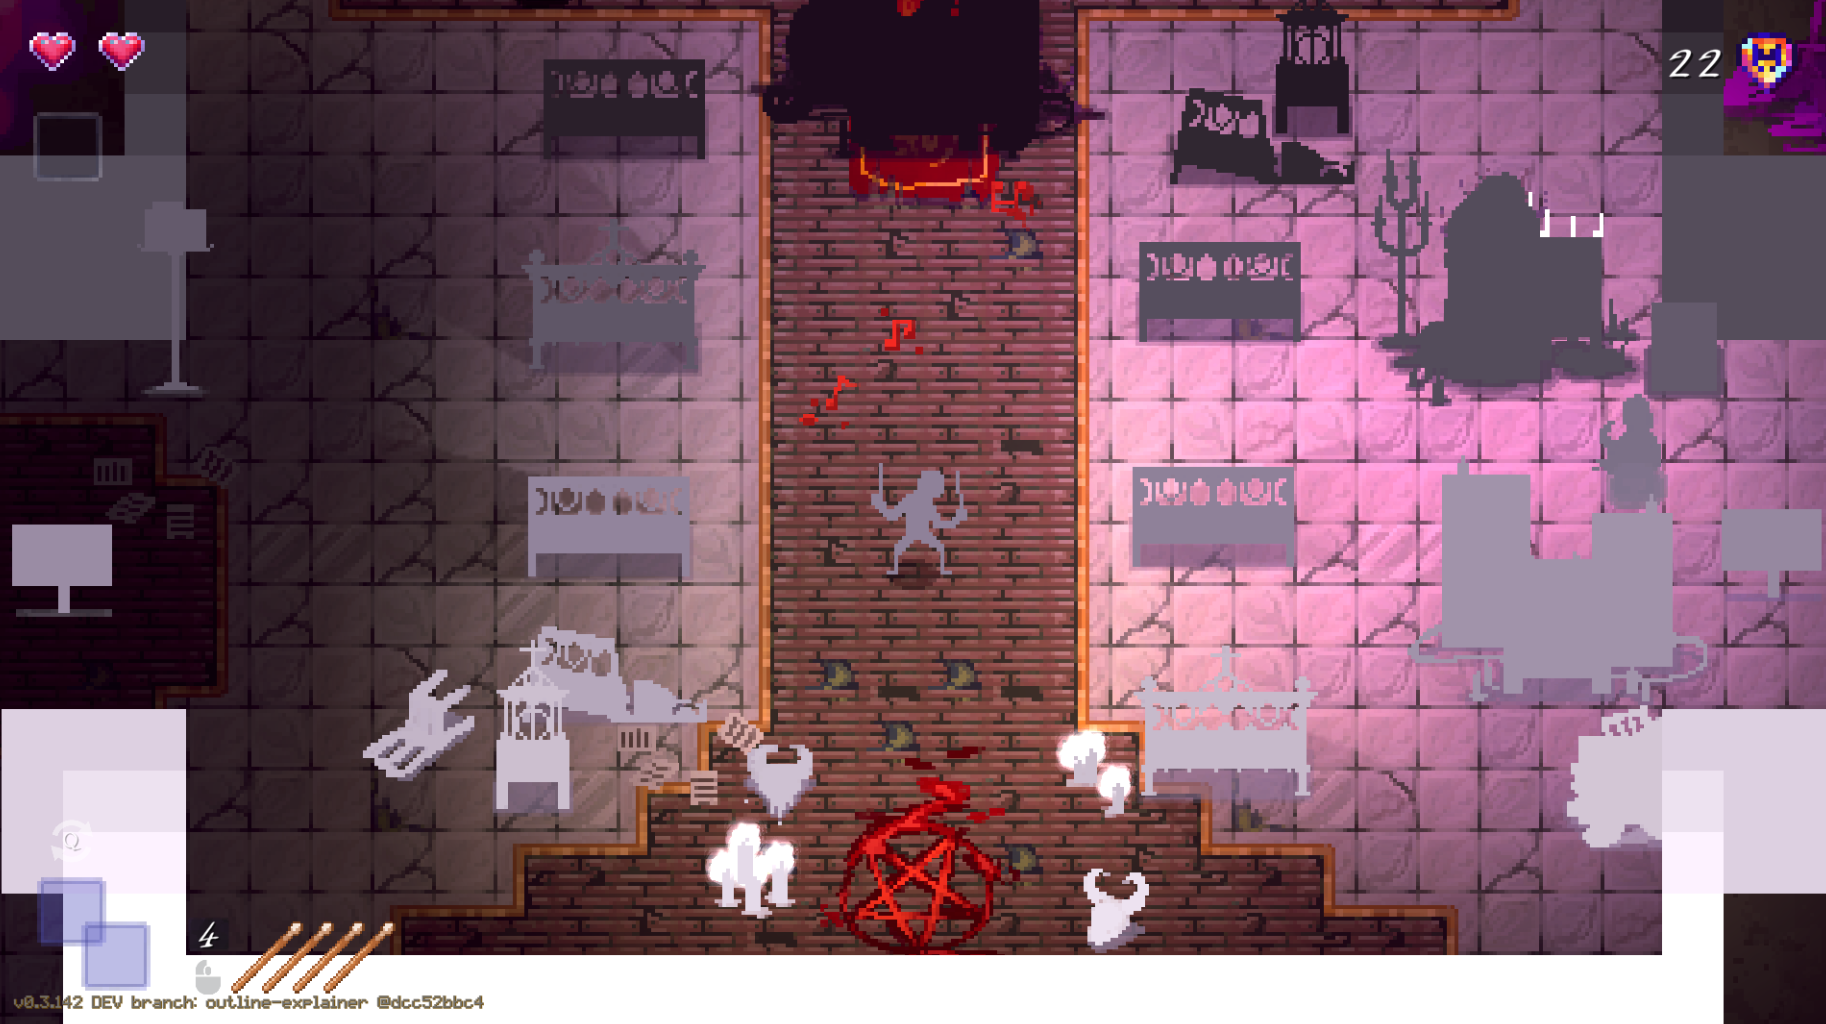
The Issue: THE FRICKING OUTLINES ARE MISSING >:(
We didn’t think about this. It’s only a tiny feedback effect, but critical in letting the player know they can interact with an object. Without this you have no idea what the game will do when you press the interact button. And it’s not clear what’s an interactable game element, and what is a static prop.

TLDR: Game looked pretty. But Game bad.
So lets fix it!
I also bet my team I’d finish the outline in a day :D
 Hate it when people hold me accountable. Sprites swapping probably would have been fine. But I gotta justify my job somehow…
The Solution: Make a new outline render, you silly goose.
After ChatGPT lead me down a useless and blatantly wrong rabbit hole for 2 hours, I realised that we’re not quite yet at the singularity just yet.

Backtracking on the AI sabotage, the solution that worked was Render Features
These are really cool custom steps in a URP rendering process that allow you render pretty much anything you want. You can insert these steps in almost any order in the render pipeline, and the steps will happen for each camera within its own render.
So essentially: render feature go BRRrr, and camera make image.
- No multi camera nonsense.
- No Massive compositing shader.
- No sad times. Hopefully.
Some example render features you can add. From the unity docs
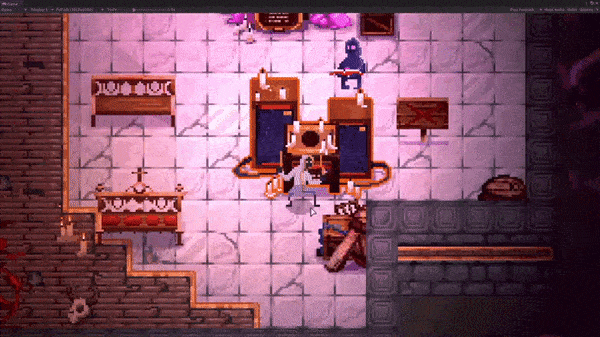
OK, so I make OutlineRenderFeature.cs. Game is fixed, right? YEAH… KINDA. In theory. In practice it’s the same but just a lot slower, and more painful with substantially more failure. Wonderful.
Here’s how my brain went about it:
OK. I need to make outline.
What types of outlines do I know?
- Inverted hull
- Inverted hull in 2D would be a sprite drawn before the main sprite is drawn, as a silhouette then expanded a bit. Once the main sprite is drawn over this expanded silhouette, we got an outline!
- Sobel operator
- Sobel is 2D by default but generally works on a depth buffer for Metavoidal. It would probably be something like compare the opacity of a sprite over a small area of pixels. Where there is greater change in opacity over the area, draw a color, or else don’t draw a color.
Sobel seems hard. Also our old outline was silhouette based. Lets re-use some of that.
In both instances the outline could be rendered on the sprite’s mesh (or a duplicate of it) but I was worried we would get clipping on certain meshes if they were tightly wrapping the opaque pixels (Since you need to expand the area the opaque pixels occupy slightly to get an outline).
So in my really smart brain I opted to do the outline as a fullscreen render feature using [Blit](https://docs.unity3d.com/ScriptReference/Graphics.Blit.html)
The Hurdle: The supporting actor was playing the lead’s role…
=D
 Like the kid in the school play who shines a little too bright.
Here’s how my night ended up going:
- **Gets silhouette rendering on screen**
- Silhouette is covering the object it's supposed to be outlining
- Silhouette is always in front of everything
- Its 11pm
- Realize I'm not getting sleep tonight
So after a small break to consider the hole I’d dug myself into, I decided that the best course of action was to keep on digging. (Didn’t really have a choice If I wanted to stick to my promise.)
So, back to work! Post effects are often used in combination with a depth buffer. This is a grayscale image that shows the distance each object is away from the camera. This effect makes a lot of sense in 3D games.
For example, here’s Minecraft’s depth buffer. Far thing is dark, close thing is light. The distance is encoded into an unseen texture, basically. (Taken from some random reddit post.)
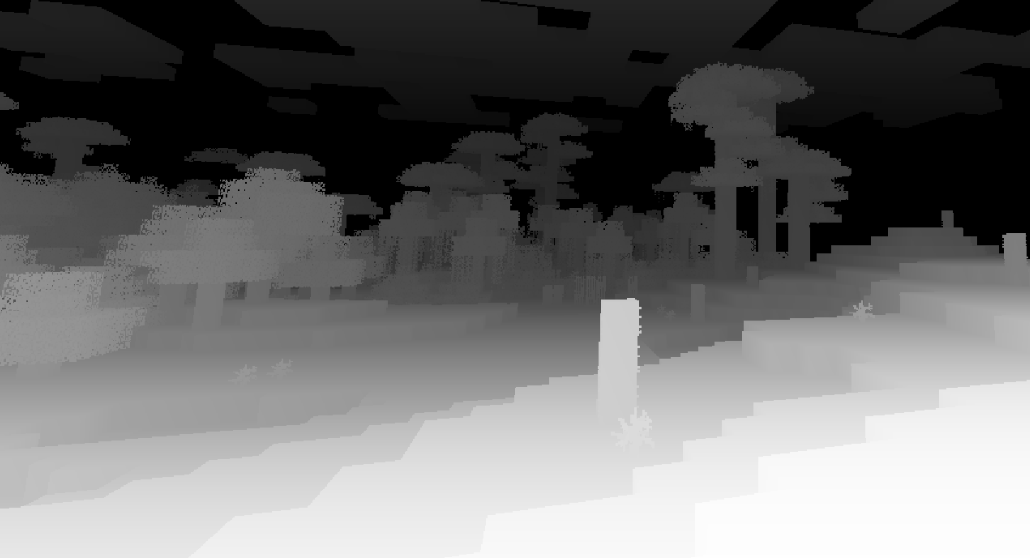
So at any point for any pixel on the screen we can know how far away from the camera we are. You can use this to skip drawing parts of an object that are hidden behind something else, or render over an object that’s further away. The order that objects render in this approach does not matter in respect to occlusion.
In a 2.5D, faked orthographic perspective, pixel art game such as Metavoidal, the idea of “distance to the camera” is not so straightforward.
2D games often use something called “The Painters Algorithm”.
Basically, you put Object2, which covers Object1, on screen after object1. Like a painter would paint.

So for the most part we don’t need to know what’s in front or behind once the sprites are drawn. The order they are drawn determines what’s in front.
This works great, but it relies on the order sprites are rendered in. We just introduced a post effect that needs to retroactively be occluded by objects already on the screen.
So…
The Solution: Let’s make our very own depth buffer! :D
In Metavoidal, sprites are generally ordered by their pivot point (their local origin) from top to bottom (Y axis). Higher Y position means they’re rendered earlier and, in depth buffer terms, further from the camera.
But my internal monologue was like
I have no idea if this is standard practice, or stupid.
Or if we can write to the existing depth buffer that seems to still be in URP even in the 2D renderer
Or what the hell a sprite mask is?
And WTF is a camera sorting texture??
UNITY WHY IS THE DOCUMENTATION SO TERRIBLE?
At this point I got seriously over all of these ambiguous as hell “Features” and decided to approach the problem like a basic b*tch. So instead, I’ll write each sprite’s Y screen pivot position to a texture and call it a depth buffer, then send that to my outline render feature and let it cull itself if it determines it’s behind something lower on the screen.
 Depth is not calculated for everything. Only the things we care about. Floor is (presumably) always behind. So we skip that.
And it worked! :3
Yeahhhh the outline finally knows its place in the world
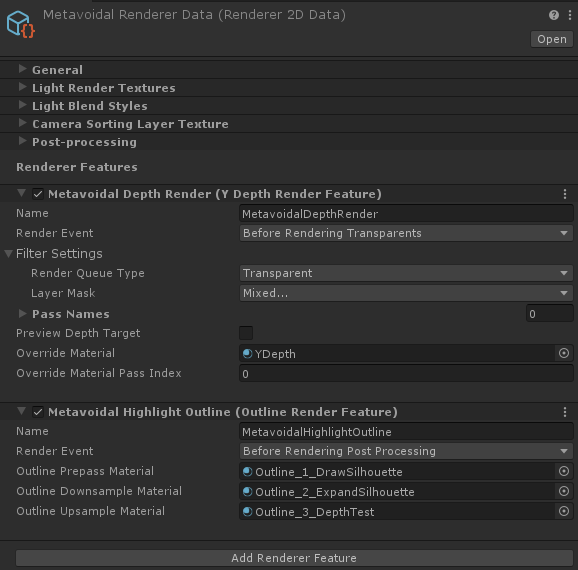
General Technical Overview
I’ve skipped over some details. So in the interest of clarity here’s a TLDR.
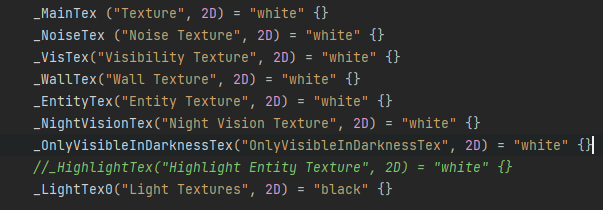
There are four shaders involved, and two render features.
- Depth render feature
- Renders Y depth to global texture using YDepth shader (Using
ScriptableRenderContext.DrawRenderers)
- Renders Y depth to global texture using YDepth shader (Using
- Outline Render Feature
- Outline silhouette/pixelate - round to the closest virtual pixel based on pixel perfect reference resolution.
- Outline expand - A simple cross kernel that copies the surrounding color into the current pixel in some specified radius.
- Outline cull - use the depth information retrieved in the silhouette phase (stored in alpha channel, copied during expand phase) to cull the outline pixels wherever something should be in front of it.
- These three shaders are run via Blit in the same
ScriptableRenderPass.
This is what the render data Scriptable object looks like.
Takeaways
This solution has so far proven really robust. I’m really happy with it, and having a 2D depth buffer present opens up a lot of potential for interesting rendering effects.
I think there are probably simpler solutions (Sobel-opacity based outline built directly into the sprite shader) but they aren’t as cool. So eat my dust.
As always, first principles allow you to make things without relying entirely on the affordances of the systems you are using. I don’t understand most of Unity and the render pipeline but the basics of rendering are enough to allow me to MacGyver solutions that suit my context. And that’s pretty much Game Dev, right?
The most important thing I learnt is that you should not bet your team you will finish a feature in a day because then you won’t sleep. But you will make a cool outline effect. So, yey?

Alright, all for this devlog! We hope it helped you learn how NOT to do things as much as it taught you how to render an outline in Unity. Super educational stuff.
If you’re interested in MV then keep an eye on our pages to see when the next game update goes live, which is soon(tm)! We’re excited to show you all the cool things we’ve hammered into and onto the new build.
Have a lovely day, Random Internet Person. We appreciate your existance!
<3 Ross and his Devlog editor, Bianca :)
Leave a comment
Log in with itch.io to leave a comment.